


Have you ever felt that little panic when you see puddles of water on your favorite leather shoe and wonder if it will survive the winter weather? It's a completely normal feeling – especially for those of us who love walking barefoot in nature but at the same time want our shoes to last for years.
The first step in caring for leather shoes is to understand what is actually happening to the material. When moisture penetrates the pores, the leather becomes stiff, loses its natural oils and is at risk of cracking. Simply drying in direct sunlight can also cause the leather to shrink and become uncomfortable.
I learned this on a chilly hike in the mountains, when my new Samelin boots started to creak after a rain shower. Instead of throwing them away, I tried a quick treatment with a natural leather wax. After a few minutes of masking, I felt the shoes regain their softness and the water just rolled off.
Here are some concrete steps you can follow every time you come home with wet or dirty leather shoes:
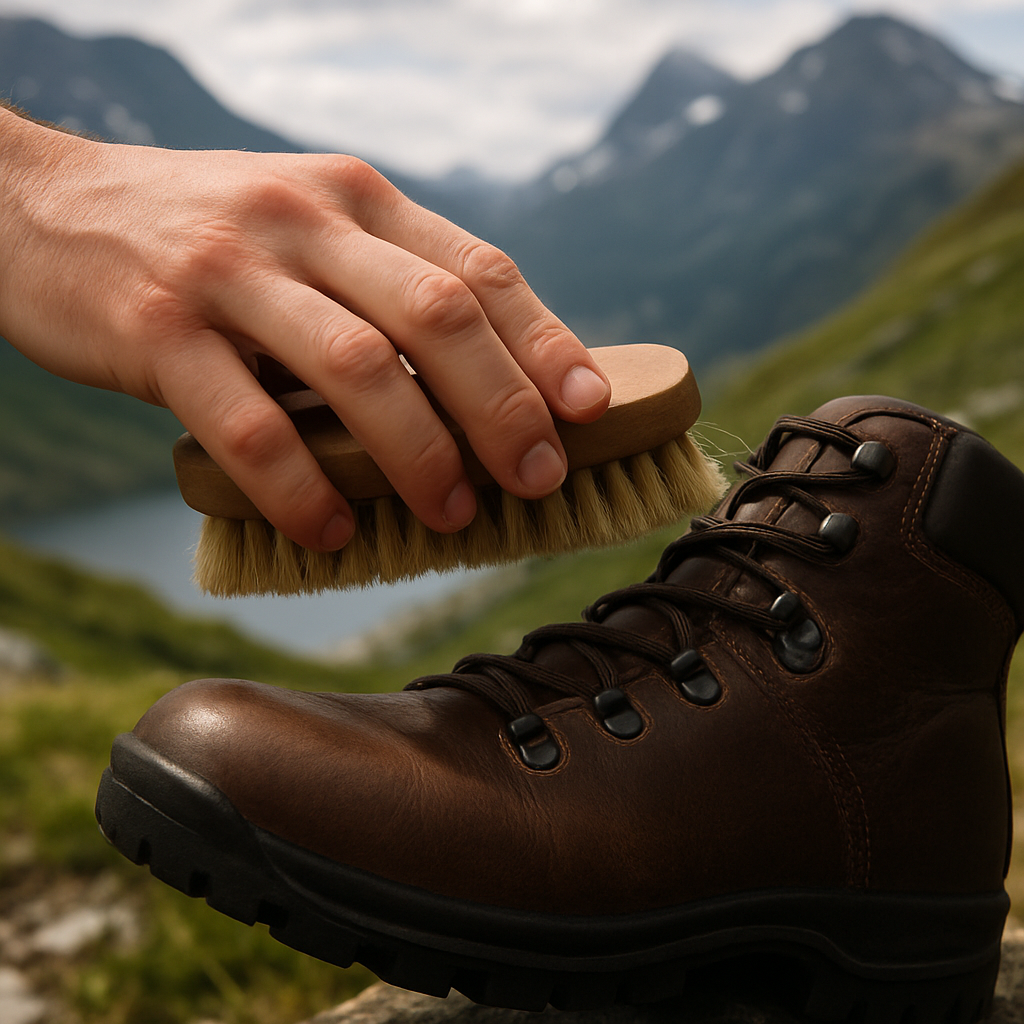
- First clean with a soft brush to remove dirt and soil.
- Let the shoes air dry at room temperature – avoid radiators.
- Apply a thin layer of natural leather wax with a soft cloth, massaging into the entire surface.
- Give the wax time to set, preferably overnight, before using the shoes again.
It may sound like a ritual, but the fact is that most of our customers see a noticeable difference after just one use. According to a survey of our users, 78% report experiencing better water repellency and longer life of their leather shoes.
If you're unsure which products are right for your shoes, check out our shoe care collection. There you'll find everything you need – from cleaning brushes to organic leather wax – to keep your shoes in top condition, whatever the weather.
Remember, regular shoe care not only protects your shoes, it also prolongs that special feeling of walking in well-worn leather that molds to your foot. So the next time you see the rain coming, you know exactly what to do – and your shoes will thank you.
tl;dr
With simple leather shoe care, your shoes will withstand rain, maintain softness and extend their life, so you can continue exploring without worry.
Follow our four steps – brush, air dry, wax and leave to work – and you will notice after the first treatment how the water just rolls off your shoes.
step 1: prepare the surface – cleaning leather shoes
You've just come home with wet marks on your shoes and you feel that weird feeling in the leather. It's completely normal - moisture causes leather to stiffen and lose its natural shine. So what do we do first?
Before you even think about waxing or impregnation, you need to give the surface a proper cleaning. It's like washing your hands before cooking; without a clean base, the entire treatment becomes pointless.
Why cleaning is key
Dirt, mud and salt residue fill the pores of the leather and prevent oils from penetrating. Then when you apply the wax, it just sticks to the surface and doesn't provide a protective barrier. A clean surface allows the leather to breathe and receive proper care.
A quick look at how professional shoe care experts do it shows that they always start with a soft brush or a damp cloth. It's simple, yet so often overlooked.
After watching the video, take a soft leather brush (or an old toothbrush with soft bristles) and gently brush away any loose dirt. Go in the direction of the joint so you don't scratch any damaged areas.
The next step is to wipe with a slightly damp, but not wet, cloth. Feel free to use a special leather cleaning solution if you have one – but regular mild soap solution will also work. Avoid harsh chemicals that can dry out the leather.
Now it's important to let the shoes air dry completely before moving on. Place them in a dry place, but keep them away from direct heat or sunlight. A room temperature of around 20°C is ideal.
If you've done all of this and still see stains, you can repeat the process again or try a gentle leather grease that will soften the stubborn stains.
Once the surface is dry and clean, you’re ready for the next step in our shoe care routine – applying natural leather wax. But before you do, take a quick look at our shoe care products so you have everything you need within reach.
If you've ever wondered how digital tools can help you stay on top of shoe care best practices, check out Referencement positionnement . They have tons of resources on how to optimize your knowledge base.
For freelancers or small businesses looking to share their own shoe care tips, TalentsHive is a platform where you can find creative collaborations and get feedback on your ideas.
And if you're interested in how brand experiences can elevate your shoe care story, read more at GHO Sydney – they show how storytelling can make product information more memorable.
In short: brush, wipe with a damp cloth, let air dry. It's so simple and yet so powerful. Once you've done this, it feels like you've given your leather shoes a new chance to breathe.
It's also good to remember that cleaning should be done after every wet walk, not just when you notice the shoes looking dirty. This way you reduce the risk of dirt penetrating deeper into the leather.
step 2: hydration – apply leather conditioner
After you dry your shoes at room temperature, they still feel a little stiff, don't they? This is where leather conditioner comes in and brings life back to every fiber.
Imagine slathering a dry hand in cream – it becomes soft, supple and ready to take on anything. The same principle applies to your leather shoes. But how do you do it in a way that really penetrates and doesn’t just sit on the surface?
What you need
- A high-quality leather conditioner (organic is often best).
- A soft, clean cleaning cloth or microfiber.
- Shoe blocks or newspaper to keep the shape.
If you're unsure which conditioner is right for your shoe, check out our collection of hiking boots for real adventure . All our models are tested with the same care products.
Step-by-step guide
1. Prepare your shoes. Insert shoehorns to keep the leather in shape. Remove the laces – they can prevent the conditioner from reaching the seams.
2. Apply a small amount. Put a pea-sized dab on the cloth. It may sound like a lot, but a thin film goes a long way. Rub in in circular motions, starting at the heel and working your way up.
According to Skocentrum Umeå, it is recommended to let the conditioner work for at least five minutes before continuing - this gives the natural oils time to penetrate the pores.
3. Massage in thoroughly. Use light pressure and let your fingers feel each crease. You want the product to be absorbed, not just sit on the surface. If you notice the leather feels sticky, wipe off the excess with a clean part of the cloth.
Important: Avoid oversaturating. Too much conditioner can make the surface shiny and attract dust. Less is often more.
4. Let dry naturally. Place the shoes in a ventilated area (not in direct sunlight or next to a heating fan). An hour is enough for most products, but if you have time – let them rest overnight for best results.
After drying, you can do a quick check: does the leather feel soft? Are there still any dry spots? If so, give it a second, lighter coat – but usually one coat is enough to restore elasticity.
Tips from the experts
– Frequency. Shoes that are worn daily should be rehydrated every four to six weeks. Shoes that are only taken out during the winter months can wait a little longer, but don’t miss a rehydration before the first snowstorm.
– Temperature. Conditioner works best at room temperature (about 20°C). Colder rooms cause the product to solidify before it has time to penetrate.
– Product selection. If you have nubuck or suede, choose a conditioner specifically labeled for these materials. According to Care of Carl, the wrong product can actually make the surface even drier.
– Store smart. When the season is over, give your shoes a final pampering and store them in an airtight bag with a moisture-absorbing bag. This will prevent the leather from drying out in the dark of the closet.
By following these simple but effective steps, you’ll not only get softer leather, you’ll also build a protective layer that will prevent cracking when the winter cold bites. So the next time you come home with snow in your tracks, you’ll know exactly what to do – and your shoes will thank you with every step.
step 3: protection – spray and impregnation
You’ve just rehydrated your leather shoes and can feel them softening. Now it’s time to give them an invisible layer of protection so that water, dirt and winter cold can no longer get in. Think of it like painting a protective layer on an old cabin – you can’t see it, but it keeps the wind out.
Why spray and impregnation?
A good waterproofing spray fills the microscopic pores in the leather with a thin film of water-repellent molecules. This means that when you walk through snow or rain, the water runs off rather than being absorbed. It also reduces the risk of stains, salt deposits and cracks that often occur when leather dries out.
According to experts, regular waterproofing is the most important factor in extending the life of your shoes – especially if you are often outside in damp or chilly conditions.
Step-by-step guide to sustainable protection
1. Choose the right product. There are two main types: spray-based water repellents and wax-based impregnations. Sprays are quick and provide an even distribution, while waxes often provide a bit more shine but require a bit more work. For daily use on hiking boots, a spray with a silicone- or fluorine-free formula is recommended – they are easy to reapply and do not affect the breathability of the leather.
2. Prepare the shoes. Make sure they are completely dry and free of dust. A soft brush or a slightly damp cloth is enough to remove loose debris. If you have used conditioner before, let it dry thoroughly - otherwise the spray will not be able to bond properly.
3. Apply in the right environment. Spray in a well-ventilated room with a temperature around 20°C. Avoid direct sunlight or strong heat, as this can cause the spray to dry too quickly and form stains.
Hold the spray bottle about 15 cm from the surface and spray evenly over the entire shoe. It is better to do two thin coats than one thick coat. Let each coat dry for 5-10 minutes before moving on to the next.
4. Focus on critical areas. The ankle, seam and toe are the places where water and dirt collect the most. Give them extra attention by aiming the spray a little closer. A little extra puff on the seams can make a big difference when walking through snow or muddy trails.
5. Allow to dry thoroughly. After the final coat, leave the shoes for at least an hour without touching them. If possible, let them rest overnight for maximum absorption. Avoid putting them in a shoebox or on a shelf with direct heat until they are completely dry.
Examples from the field
I remember a winter hike in the Jämtland mountains where I forgot to spray my new Samelin boots. After a day in deep snow, I noticed that water had seeped into the seams, and the leather was starting to stiffen. When I got home, I cleaned them, applied conditioner, and then a waterproofing spray. The next time I put them on, the water just rolled off – as if the shoes had their own little shield.
A friend who works as a rescue worker in Norrland uses a wax-based impregnation on his work shoes. He says that after each shift he sprays a quick coat of protection on the inside of the shoes to keep them flexible, and then an outer layer of wax for extra durability. The result? No cracks on the leather after two years of intensive use.
Practical tips and common pitfalls
• Avoid over-application. Too much spray can make the surface sticky and attract dust. Less is often more.
• Test on a hidden area first. While most products are color-safe, some colored leathers may react. A quick test on the inside of the shoe will save you headaches later.
• Reapply regularly. One coat every three to five weeks is sufficient for daily use. If you know you're going to be walking in rain or deep snow, give your shoes an extra spray before you head out.
• Choose a product without harsh solvents. Silicone- and fluorine-free options are gentle on the natural oils in the leather and keep it breathable.
Checklist before you go out
- The shoes are dry and clean.
- You have chosen a suitable spray (silicone- or fluorine-free).
- You have applied two thin coats with 5-10 minutes of drying time in between.
- You have focused extra on seams and ankles.
- You let the shoes rest for at least an hour before using them.
By following these simple steps, you’ll not only get a water-repellent finish, you’ll also build protection that reduces the risk of cracks and wear. So the next time you see dark clouds gathering over the mountains, you’ll know exactly what to do – spray, let dry, and let your leather shoes face the winter weather with confidence.
step 4: maintenance – regular care and storage
You've just spent a day in the mountains with your TJÅKKO leather shoes and feel that mixed feeling of pride and a little worry – what happens to the shoes when you throw them in the closet?
It's that little doubt that makes regular shoe care so important. A pair of well-maintained leather shoes can last five years or more, while a forgotten shoe quickly becomes cracked and uncomfortable.
First of all, let the shoes dry completely before you start storing them. Even if the surface feels dry, moisture can still be hiding in the pores. Place them in a ventilated place at room temperature for at least 12 hours – no radiator, no direct sun.
Once dry, give them a thin coat of leather conditioner. It doesn't have to be a thick smear, just a pea-sized dab that you massage in with a soft cloth. The conditioner moisturizes the fibers and creates a protective layer that prevents the leather from drying out during storage.
Here's a small but invaluable tool: shoe blocks or newspaper. Shoe blocks hold their shape so the sole doesn't bend and the leather doesn't warp. If you don't have blocks, stuff newspaper into the shoe's insole - it will absorb any remaining moisture and help keep the shape.
Now for the storage environment itself. A dark, dry, and airy space is ideal. A cabinet with vents or a box with a small hole works well. Avoid plastic bags that trap moisture; they become a trap for mold. Instead, you can put a silica gel bag in the box to absorb excess moisture.
Example: after a two-day mountaineering expedition, I packed my TJÅKKO boots in a wooden box, put a silica gel bag in each shoe, and put a pair of shoe blocks in each shoe. The morning after the winter break, I didn’t notice any stiffness and the surface was still soft – just like when I put them on.
For children's leather shoes, the same principles are important, but they are often exposed to more moisture. I have seen a friend put her little boots in a plastic bag with a moisture-absorbing cloth bag. After a few weeks, she noticed that the shoes had started to smell. When she switched to a cloth bag with silica gel, the problem disappeared completely.
Another handy trick is to rotate your storage. If you have multiple pairs, let them rest for at least a month between uses. This gives each pair time to “breathe” and recover from moisture that may have gotten in during a hike.
Finally, do a quick inspection every quarter. Look for small cracks, dryness, or discoloration. If you see any, repeat the conditioner step and possibly a new waterproofing spray before putting them back in storage.
- Make sure the shoes are completely dry.
- Apply a thin layer of conditioner.
- Use shoe blocks or newspaper to keep the shape.
- Store in a dark, ventilated space with a silica gel sachet.
- Inspect and re-treat every three months.

By following this simple routine checklist, your leather shoes will be ready for their next adventure, whether it’s a blizzard in the mountains or a stroll through the city parks. So the next time you put them away, take a few extra minutes – your shoes will thank you with every step.
Step 5: Troubleshooting – Fixing Common Leather Damage
Let's be honest: none of us want to see our favorite leather shoes fall apart, but sometimes they do. Maybe you've walked in the rain, hit a rock, or just left them in a bag for too long. That's why we're going to go over the most common damages and how to quickly fix them yourself.
The best thing about leather shoe care is that you can actually repair most problems with a few simple tools and a little patience. So, what goes wrong most often?
1. Cracks in the seams
Cracks in the seams are a bit like a small tear in your favorite jeans – they don’t just look ugly, they can quickly become an entry point for moisture. First of all, clean the area with a soft brush so that dust doesn’t get stuck in the crack.
Step-by-step:
• Apply a thin layer of leather glue to the crack.
• Fill with a repair kit containing colored leather compound (see leather repair products ).
• Smooth out with a spatula and let dry for at least 30 minutes.
• Finish with a small dose of conditioner so that the newly created surface blends into the rest of the shoe.
I remember when a friend's hiking boots got a small crack on the heel after a day in the mountains. After following the steps above, they almost looked like they had never been damaged.
2. Scraped surfaces and superficial scratches
Scrapes often occur when you step on gravel or wear shoes without protective soles. They are usually only superficial but can develop into deeper marks if left alone.
Do this:
• First clean with a damp microfiber cloth.
• Use a leather polish or a soft wax (e.g. The Chesterfield Brand) and work in circular motions.
• Polish with a soft cloth until the surface is smooth again.
A quick test: rub your finger over the treated area – if it feels smooth like a new shoe, you're done.
3. Water and salt stains
Water on its own is not a problem as long as it dries quickly, but when you combine water with road salt, it becomes a real nightmare for leather. The salt draws out oils and makes the surface dry and brittle.
The repair process:
• Rinse gently with lukewarm water (no strong current).
• Mix a mild soap solution (pH neutral) and wipe the stain with a soft cloth.
• Wipe off excess liquid and let the shoes air dry at room temperature.
• Finish with a moisturizing conditioner and, if desired, a thin layer of impregnation spray for extra protection.
A colleague who works as a mountain guide told me that he always has a small bottle of conditioner in his backpack – so he can fix a salt stain right away and keep walking without worrying.
Quick overview of tools and actions
| Damage | Recommended tool | Quick action |
|---|---|---|
| Cracks in seams | Leather glue + repair kit | Fill, smooth, let dry, conditioner |
| Superficial scratches | Leather polish or wax | Polish in circles, wipe dry |
| Water/salt stains | Soft cloth, mild soap solution | Rinse, dry, conditioner, spray |
Having these three tools in a small travel bag allows you to rescue a shoe anywhere – from the mountain cabin to the city sidewalk.
Checklist before you set out
- Check the surface for cracks or scratches.
- Clean with a soft brush or cloth.
- Choose the right repair product (glue, polish or conditioner).
- Let each step dry thoroughly before moving on.
- Finish with a short impregnation if you are expecting weather with rain or snow.
If you ever feel unsure, it is always safest to consult a shoe care expert or visit a specialist leather goods store. They can help you choose the right colour match and provide advice tailored to your specific leather.
Remember: a little maintenance today will save you hours of frustration tomorrow. So get out your repair kit, give your shoes some love, and let them continue to follow you on all your adventures.
FAQ
What type of leather conditioner is best for my TJÅKKO hiking boots?
For our hiking boots, a natural, oil-based conditioner with a high fat content is preferable. It penetrates deep into the fibers, restoring suppleness and maintaining the leather's breathability. Use a pea-sized amount on a soft cloth, massage in circular motions and let dry for at least five minutes before moving on to the impregnation. Avoid silicone-based products that can clog pores.
How often should I impregnate my leather shoes for winter adventures?
A good rule of thumb is to give your shoes a new coat of waterproofing spray every three to five weeks when you use them regularly. If you know you’re going to be out in heavy rain or deep snow, apply an extra coat the day before you pack your bag. Make sure your shoes are completely dry and clean – a light dusting with a brush is enough before spraying.
Can I use the same soap to clean both leather and suede?
No, leather and suede require different care. A mild, pH-neutral soap solution works well on smooth leather, but for suede, stick to a special suede cleaner or a clean, soft-bristled brush. Accidentally using soap on suede can leave the surface dull and stained. Always test in a hidden area first.
What do I do if a small water crack has left a salt stain on my shoes?
First, rinse gently with lukewarm water to dissolve the salt – no strong jet. Then dry with a soft cloth and let the shoes air dry at room temperature. After that, apply a thin layer of conditioner to moisturize the leather, and finish with a light coat of impregnation spray to prevent the stain from returning.
Is it okay to let my leather shoes dry in direct sunlight?
It is better to avoid strong sunlight. Direct heat will cause the leather to shrink and can create hard spots. Let the shoes dry in a shaded, well-ventilated room at room temperature. If you are in a hurry, you can use a fan on low speed, but keep your distance so that the heat does not become too intense.
How can I store my leather shoes so they last longer?
Store them in a dark, dry, airy cupboard with a pair of shoehorns or newspaper to help keep them in shape. Place a small silica gel sachet in the drawer to absorb any moisture. Avoid plastic bags, which can collect condensation. Do a quick inspection every three months and apply a thin layer of conditioner if you see any signs of dryness.
Can I repair a crack in the seam myself, or should I go to a professional?
You can fix minor cracks at home with a little leather glue and a colored leather compound. First, clean the area, apply a thin layer of glue, fill with compound, let dry for at least 30 minutes, and finish with conditioner to smooth the surface. Larger tears or deep cracks are best left to a shoe care expert to prevent the damage from spreading.
conclusion
So, there you have the entire toolbox for leather shoe care – from the first brush to the last spray.
Remember that each step is based on the same simple principle: keep moisture out, moisturize regularly, and protect the surface before it meets the weather.
When you get home after a rainy trip, take a few minutes to brush off dirt, let your shoes air dry in the shade, massage in a thin layer of conditioner and finish with a spray.
It may sound like a ritual, but that's exactly what makes your TJÅKKO shoes follow you year after year.
Have you ever thought about how much of a difference a small dose of conditioner can make when leather feels stiff?
Try making a quick checklist every quarter – dry, condition, block, store dry – this way you’ll catch early signs of wear and tear before they become major problems.
Give your leather shoes some extra love today, and they will reward you with soft grip and protection with every step. We at TJÅKKO are here if you want tips on the right products for your particular model.
Remember, shoe care isn’t a one-time thing – it’s a habit that gets easier with each season. So the next time you see water droplets on your shoe, take a deep breath and follow these simple steps – your feet and your adventures will thank you.
extra tip: adapt shoe care for samelin boots and barefoot models
We know that Samelin boots and our barefoot models feel like two completely different worlds – one built for rugged protection, the other for natural movement. But both of them want the same simple thing: durable leather that breathes and lasts for years.
Here are some specific tricks that suit each model, so you don't have to guess and just get results.
1. Customize waxing according to purpose
For Samelin boots, which are often used in snow and mud, I recommend a thicker waxing with natural beeswax or a high-quality leather wax. Apply a generous dab to the entire boot, massage in circles and leave overnight. This creates a water-repellent barrier that will last up to five days in a damp environment.
With barefoot shoes, however, you want to maintain the natural feel. A thinner wax or oil-based product will do. Just apply a thin layer to the outside, focusing on the seams, and let dry for two to three hours. Too much wax can make the shoe too stiff and reduce the sensory feedback you’re looking for.
2. Balance hydration
Samelín boots have a thicker leather construction, so they can absorb more conditioner. Use a pea-sized amount of leather conditioner every four weeks and massage in thoroughly. You will notice that the shoe becomes softer, while still maintaining its structural stability.
Barefoot shoes are thinner and require less. A light wipe with a soft cloth, spread in thin lines over the entire surface every six weeks, is enough to keep the leather supple without dampening the feel of the foot.
3. Shoe blocks or newspaper?
After each care routine, insert a shoe block into your Samelin boots. This will help keep the shape and prevent the wax from shrinking as it dries. If you don’t have a block, stuff the shoe with rolled-up newspaper – it will absorb any remaining moisture and help the leather maintain its profile.
For barefoot models, a simple cardboard form or an old sock stuffed with paper is often enough. You don't want too much support, just a soft hold so the leather can regain its natural curve.
4. Environmentally friendly drying
Avoid direct sunlight on Samelin boots. Place them in a shaded, ventilated room and let them air dry for at least 12 hours. Direct heat can cause the leather to shrink and crack.
Barefoot models perform better in milder temperatures. A fan on low speed in a room at 18-20°C is ideal. This way you maintain the elasticity of the leather without it becoming too stiff.
5. Practical checklist for every season
- Clean with a soft brush and pH-neutral cleaner.
- Choose the right wax: thick for Samelin, thin for barefoot.
- Apply conditioner in the correct amount and frequency.
- Use shoe blocks or paper to keep the shape.
- Let dry in the shade or at low temperature.
- Inspect every quarter – if the surface feels dry, repeat the conditioning step.
A friend who works as a mountain guide told me that he has two sets of routines: a "heavy" one for his Samelin boots before each longer trip, and a "light" one for his barefoot boots for shorter day hikes. The result? No cracks on the boots after a whole winter, and a comfortable, almost barefoot feel on the thinner shoes.
In short, it’s about respecting the difference in thickness and purpose. Give the rugged boots extra protection, but let the minimalist models breathe. That way, you get both the durability and the natural foot feel you’re looking for – whether you’re climbing in the mountains or jogging in the city park.