


Do you sometimes feel like regular boots feel like a bulky bag on your feet when you're going out into the woods?
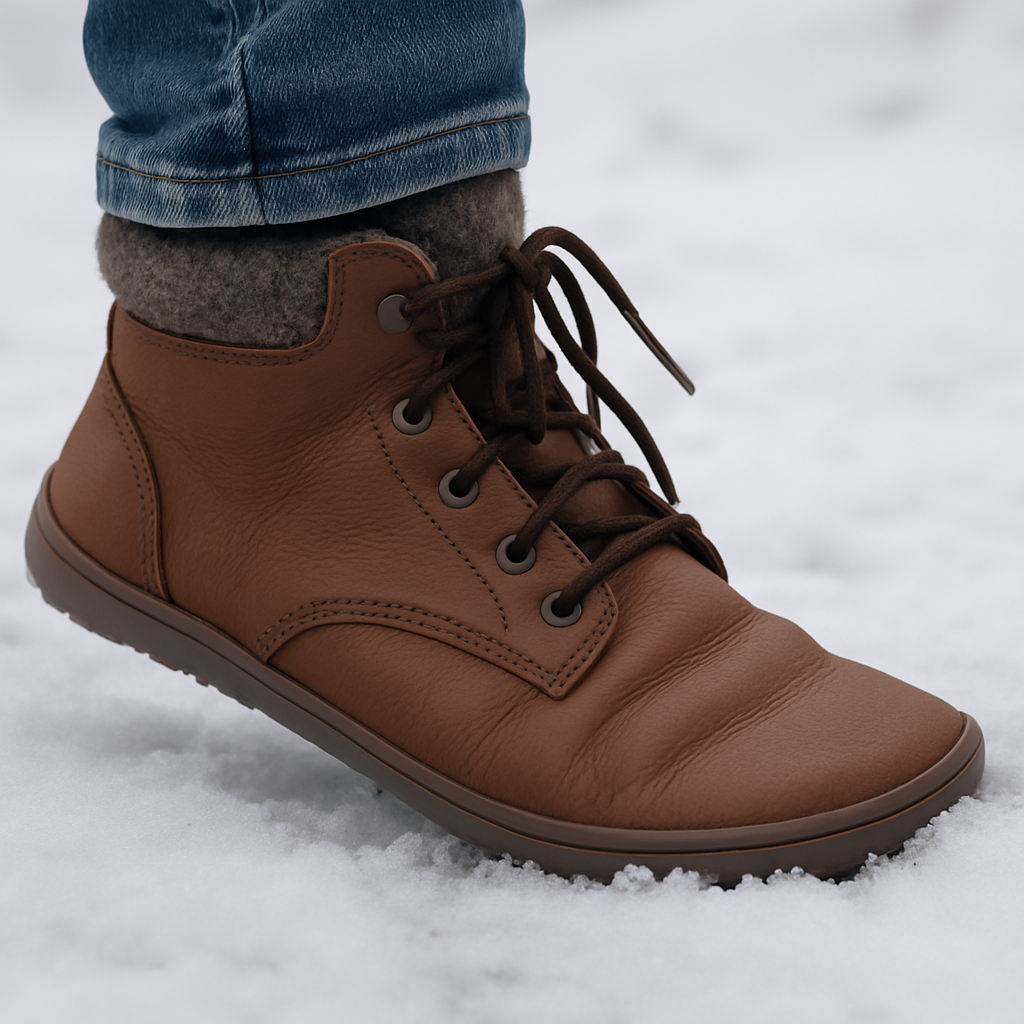
I've been there – that stiff feeling of not being able to really feel the ground, while my feet get sweaty and cold at the same time. That's why barefoot boots have become my secret superpower when hiking in the Swedish mountains and snow.
Barefoot boots are designed to let your feet move naturally, just like you would if you were barefoot, but with a protective layer against rocks, roots, and chilly temperatures. The thin soles give you better balance, strengthen foot muscles, and can actually reduce the risk of common running injuries.
Take an example from my friend Anna, who uses our winter-lined barefoot boots when she takes her family on winter outings. She told me that after just one week, she noticed that her children stopped complaining about sore feet after a day in the snow, and they could jump and run without having to change into thick winter boots.
Want to give it a try? Here are some concrete steps to get started:
- Choose the right size – your toes should have some room, but no slack.
- Warm up your feet with some simple mobility exercises before you head out for a workout.
- Start with short trips on soft ground, such as a forest path, before tackling icy trails.
- Remember to keep your shoes dry; a quick wipe with a soft cloth after each session will save both your feet and the material.
It may sound like a lot, but each step is actually a small habit that builds stronger feet and more confidence in nature. So the next time you see the snow falling and hear the wind rustling through the fir trees, remember that a pair of barefoot boots can make the difference between a boring walk and a vibrant experience.
And you, think about one thing: what's really stopping you from letting your feet breathe freely? Maybe you should just try on a pair and let them show you the way.
tl;dr
Barefoot boots let you feel every step, provide natural foot strength and keep your feet warm in the winter cold without getting sweaty.
Follow our simple steps – the right size, warm-up, short rides on soft ground – and you’ll have stronger feet, more enjoyable outings on every trail in any weather, and more confidence on the trail.
choosing the right barefoot boots for your foot type
I know how difficult it can be to choose the right pair when your feet feel like they want both freedom and protection. You've probably stood in front of the shelf and wondered, "Which model will suit my foot?" It's a completely normal frustration, but let me guide you through the most important factors.
First of all, think about your foot type. Do you have a high arch, flat foot, or maybe a normal arch? It's not just a question of comfort, but also how much support you actually need when moving around in the winter landscape.
High arch – less support, more feel
If you have a high arch, you'll usually like a thinner midsole that allows your foot to move naturally. A thin sole gives you better ground feel and allows your foot muscles to work properly. But remember, you still want a protective upper to keep you warm.
A good combination is a pair of Warm Lined Barefoot Boots for cold winter days with a 4mm sole. This will give you both warmth and the natural movement you are looking for.
Flat foot – extra stability
If you have flat feet, you may need a little more support in the heel area to avoid overpronation. Look for models with a slightly thicker midsole or a built-in support structure that is still flexible.
A pair with a wider toe box is also beneficial – allowing your toes to breathe without feeling cramped.
Normal arch – balance between feel and support
Most people have a normal arch and can often wear most barefoot boots without any problems. Here it becomes more a question of materials and outer material that can handle snow and slush.
A robust outer part made of waterproof leather or synthetic fabric is ideal for keeping feet dry, while the thin sole retains the natural feel.
So, how do you know if you've found the right model? Try a simple home workout: walk barefoot on a thick carpet for 5–10 minutes. If you feel that your foot is stable but still free, you're on the right track.
And if you ever have a problem with your equipment, remember that there are experts who can help you – like Doctor Mac Toronto for technical equipment repairs.
Here's a quick checklist to go through before you decide:
- Identify your foot type (high arch, flat, normal).
- Choose a sole that matches your support needs – thin for feel, a little thicker for stability.
- Make sure your upper is winter-ready: waterproof, insulated, yet breathable.
- Try the shoes indoors first, walk a few steps, feel for pressure points.
- Take them out for a short walk in the snow to test warmth and grip.
It may sound like a lot, but every step is an investment in the long-term health of your feet.
After you watch the video, take a minute to reflect on which part of your foot you think needs the most attention. Maybe you notice that your toes want more space, or that your heel feels a little too tight.
Finally, remember that the right pair of barefoot boots is all about finding the perfect balance between freedom and protection for your foot. Once you’ve made your choice, every step in the winter landscape will feel like a new discovery – and you’ll love the feeling of walking naturally.
Benefits of barefoot boots for everyday use
Have you ever felt like your regular boots are like a cramped little box when you just need to go to the store or pick up the mail? It's that annoying feeling of your feet lacking space and every step feeling muffled. When you switch to barefoot boots, it's like opening a window for your feet - suddenly you have both freedom and better contact with the ground.
The natural ground feel is more than just a trend; it trains your foot muscles every time you walk on asphalt, in stairwells, or on snowy sidewalks. Instead of letting a thick sole take over the job, a thin, flexible sole lets your feet work the way they were built to.
1. Strengthens your foot without you noticing it
It may sound too good to be true, but when you wear barefoot boots in your everyday life, the small muscles in your arch and toes are activated. In the long run, you will have a stronger arch, less risk of heel spurs and better balance when standing in line or waiting for the bus.
It's the same principle as when you train with light weights - you build strength without feeling tired. So the next time you walk past a park bench and notice that you're standing more steadily, you know your feet are thanking you.
2. Better posture and less strain on the knees
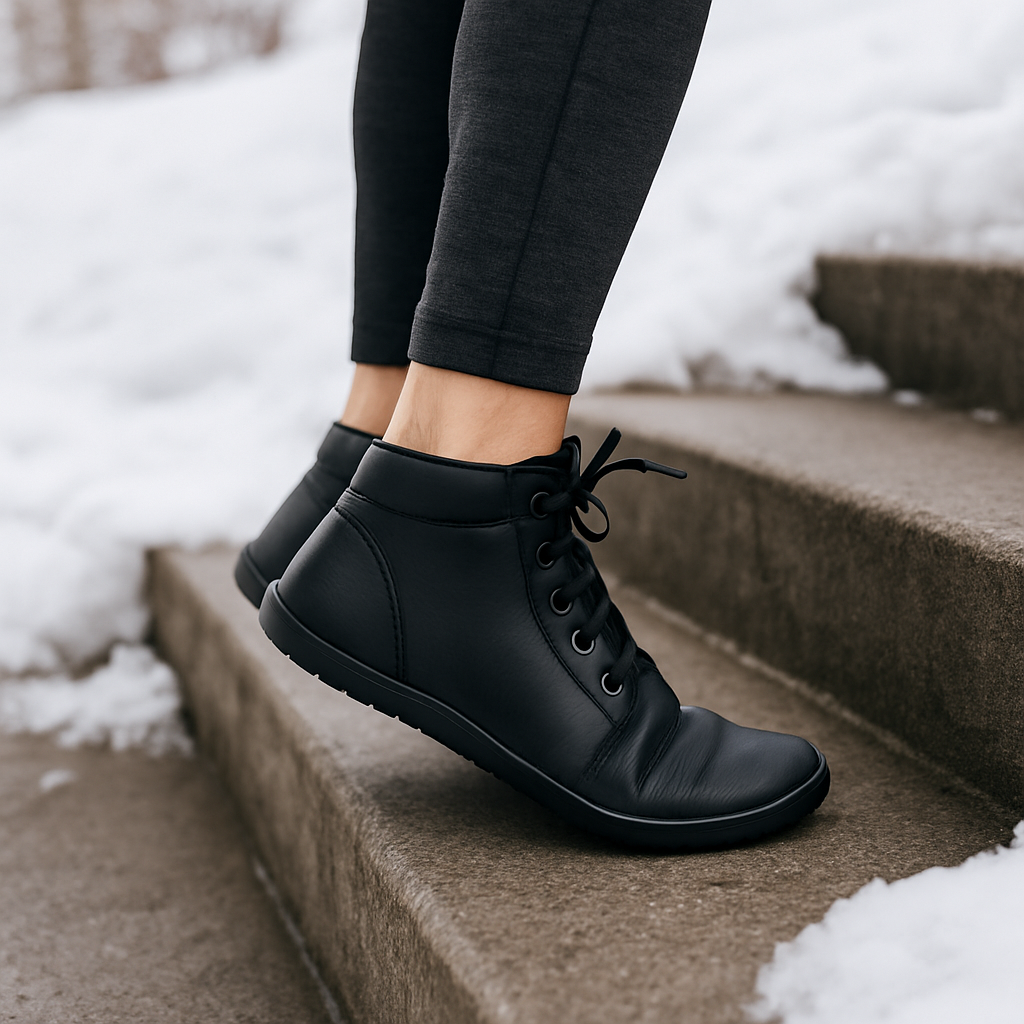
A flat, zero-drop sole like the one in the Be Lenka Entice NEO barefoot boots keeps your heel level with your toes. This means your body isn't placed at an artificial angle that can force your hips and knees to work unnaturally.
I've noticed my knees feel less sore after a few weeks of daily use. It's like resetting a small chain of misalignments that have built up over years of wearing thick, bulky shoes.
3. Heat without sweating
Winter boots can often be a sweaty nightmare, but barefoot boots with a fleece or sheepskin lining provide just that soft warmth without trapping moisture. The thin lining breathes, so you end up with cold, wet feet after a short walk in the snow.
It's also a bonus for those who want a stylish look – you don't have to change into heavy winter boots when the temperature is just a little chilly.
4. Versatile design for everyday use
Modern barefoot boots have gone from being just “funky” to being downright stylish. Think Chelsea-inspired styles with wide toe boxes that allow your toes to spread naturally, yet still look elegant with a smooth Nappa leather upper. They’re just as suitable for work as they are for a weekend walk in the woods.
This means you don't have to change shoes every time you go to the office or meet friends – a pair of barefoot boots is enough for both meetings and adventures.
5. Easy to care for
You don't need a whole workshop to keep them looking fresh. A quick wipe down after every rainy day and a little regular impregnation is enough to keep the surface water-repellent. Plus, the sole is so thin that you can quickly feel when it's starting to wear out - you'll know exactly when it's time for a new pair.
And if you ever get a chafing, it's just as easy to add a thin insert or sock for extra protection – without losing the natural feel.
So, what's next? Try taking a short walk in your current boots, notice how your feet feel, and then compare it to a pair of barefoot boots in the same conditions. Feel the difference in ground contact, in the way your knees move, and how quickly you warm up without breaking a sweat.
If you've tried them, please share how your feet have changed in the comments. We're curious to hear your experiences and help each other find the perfect balance between style, warmth, and natural movement.
Comparison: Barefoot Boots vs. Traditional Hiking Boots
Ground contact and balance
The first difference you'll notice is how the ground feels under your feet. With barefoot boots, every rock, every trail, feels like you're walking barefoot but with a protective layer. Traditional hiking boots have thicker midsoles that cushion the feel and can hide bumps.
This means you gain better proprioception – your body knows exactly where you stand. So when navigating over slippery rocks or soft foliage, you gain natural balance without having to guess.
Weight and energy
Barefoot boots are often 30-40% lighter than their traditional counterparts. It feels like you forgot you were wearing shoes, reducing fatigue on long days in the mountains.
The lightweight construction also means less energy is lost with each step, saving you energy to climb steep slopes or keep up the pace over long distances.
Flexibility and range of motion
A thin, flexible sole allows your foot to flex, rotate, and adapt to the terrain. This strengthens your foot and calf muscles, and you feel more alive with every step.
Traditional boots have a stiffer outsole for protection and support, but it restricts natural foot movement and can lead to stiffness if you wear them daily.
Insulation and heat
Winter-lined barefoot boots, like the Be Lenka | Elio Barefoot Boots for Natural Foot Development , combine natural wool and sheepskin for warmth without getting sweaty. They let your feet breathe and keep you dry.
Traditional hiking boots often use synthetic linings that can get damp and cold, especially if you sweat on a hill and then stand still in the snow.
Protection and durability
Both types have an outer shell that protects against rocks and roots, but barefoot boots use durable but thin material so you can quickly see wear and tear, making it easier to know when it's time for a new pair.
Traditional boots are built to last for years, but their thick soles can become sloppy as they wear out, ultimately reducing protection.
Practical care
Barefoot boots are easy to dry and waterproof. A quick wipe down after rain or snow is often enough. Because they are thin, you will notice early on if the sole has started to wear out.
Larger hiking boots require more maintenance – water-repellent treatment, inspection of screws and sometimes re-sanding of the insole.
Who is best suited?
If you want a shoe that lets you feel every step, strengthens your feet, and still keeps you warm in winter, barefoot boots are your best choice. They are suitable for both everyday wear and light mountain hikes.
If you plan heavy, long hikes with a pack, or often walk on extremely uneven terrain, a traditional hiking boot with extra support and cushioning may be safer.
Quick comparison table
| Property | Barefoot boots | Traditional hiking boots |
|---|---|---|
| Ground contact | High - thin sole gives a direct feel | Low – thick cushioning hides underlayment |
| Weight | 0.5‑0.8 kg (lower) | 1.0-1.5 kg (heavier) |
| Flexibility | Very flexible, natural range of motion | Stiffer, limited foot movement |
So, what feels right for you? Try taking a short walk in your current boots, feel how the ground speaks to you, and then try a pair of barefoot boots in the same conditions. You’ll quickly notice the difference in balance, energy, and how quickly you warm up without breaking a sweat. Once you know what suits your style and goals, the choice becomes easy – and your feet will thank you.
How to train your feet for barefoot boots
I know how it feels when you put on a pair of barefoot boots for the first time and suddenly realize that your feet are like an unexpected gym. It's a bit like going from the couch to a workout without even warming up. So let's go through how you can build strength and endurance step by step, without feeling overwhelmed.
Why train your feet first?
It's not just about being able to handle a long hike. A strong foot provides better balance on slippery rocks, reduces the risk of heel pain, and helps you maintain a natural posture when walking uphill. Think of it as a small engine that powers your entire body.
Have you ever walked on an uneven path and felt like you were tripping more than usual? It's often the stability of your feet that's lacking. When you train them, each step becomes more controlled - you'll notice the difference after just one week.
Step 1: basic mobility
Before you even put on your boots, give your toes and arches a quick mobility routine. Stand barefoot on a soft mat, spread your toes as wide as you can and hold for five seconds. Repeat ten times. Do the same with your arches: tuck your toes together and gently press them into the ground, as if you’re trying to draw a small circle with your whole foot. It might feel a little strange at first, but it’s that little “feel wrong” that means you’re activating your muscles.
If you have a stroller or stairs nearby, you can also roll a small tennis ball under the arch of your foot for 2-3 minutes. This massages deep tissues and improves blood circulation.
Step 2: short walks on soft ground
Start with 5-10 minutes on a forest path or grassy area. Keep the pace slow, focusing on feeling every stone and blade of grass. If you notice any soreness in your heel, take a short break and massage the area with your hands.
Example: Anna, one of our customers, started with an 8-minute walk around her neighborhood on the winter grass. After two weeks, she felt that her feet were less tired and she could walk further without getting blisters.
Step 3: Bodyweight strength exercises
This is where things get a little more “gym-like.” Do three sets of the following exercises, resting 30 seconds between sets:
- Heel-to-toe walking: Walk 20 steps on your heels, then 20 steps on your toes. This works both your calf muscles and your arch.
- One-legged balance on soft ground: Stand on one leg for 30 seconds, switch legs. If you feel confident, close your eyes for an extra challenge.
- Toe raises on a stair: Stand with just your toes on the front step, lower your heel down and lift it back up. Do 15 repetitions.
Each exercise feels like a little “click” in your foot motor. You can do them at home, in the garden or in a parking garage – the most important thing is that you get a controlled movement.
Step 4: gradually increase the load
When you feel like 5-10 minutes feels like a breeze, add two minutes per session. After two weeks, you can aim for 20-30 minutes on varied terrain – rocks, leaves, a little mud. It’s important not to jump straight to an hour in snow, as you risk overexertion.
If you are planning a longer mountain hike, try a “simulated” trip on the weekend: pack a light backpack (5-7 kg) and walk a longer route with your barefoot boots. This will provide both weight and terrain training while getting used to the extra load.
Step 5: recovery and care
Just like you would stretch after a workout, give your feet some attention after a day in your boots. Use a foam roller or a rough towel to massage the soles of your feet. Change into dry, moisture-wicking socks and let your boots air dry before putting them in your bag.
A quick wipe with a soft cloth after each session is a simple routine that saves both the material and your feet from damp surprises.
And remember, every step is a small investment in stronger feet. You don't have to become a marathon runner overnight—just stick to these five steps and let your body adapt at its own pace.
common questions and mistakes to avoid
You may have already tried barefoot boots on a short walk and are wondering, "Do they actually work in real winter?" It's a perfectly normal question, and this section is here to answer those small but important questions while also pointing out common pitfalls that can make your experience much less smooth.
How often should I clean and dry my barefoot boots?
It sounds like a simple thing, but many people forget to dry their shoes after each workout. A damp inside quickly becomes a breeding ground for odor and colder feet. Here's what you can do:
- Shake off loose snow or mud immediately after the hike.
- Wipe the inside with a soft cloth – a few seconds is enough.
- Leave the shoes on a ventilated shelf for at least an hour before storing them.
If you have a winter-lined model with a wool lining, let the wool breathe. Avoid putting them in a plastic bag, as this will only trap moisture.
Can I walk in deep snow with regular barefoot boots?
It depends on the insulation. A model without extra lining can handle packed snow and ice more easily, but in deep, loose snow you can quickly feel the cold in your toes. A smart trick is to add a thinner lining – a thin merino wool sock acts as an extra layer without taking away the feeling of ground contact.
Another solution is to choose a boot with a small waterproof membrane (such as those we offer at TJÅKKO), which keeps moisture out but allows your feet to breathe.
Which sock is right?
It’s tempting to put on thick, warming socks, but they reduce the natural movement of your feet. We recommend thin, moisture-wicking socks made of merino wool or synthetic microfiber. They keep your feet warm, but allow your toes to move freely. If you feel cold, add an extra layer only after you’ve taken a few steps – that way you know you haven’t overdone it.
What is the biggest mistake beginners make?
Going too far, too fast. I've heard many people say they went for an hour-long hike in the snow with new boots and then got pain in their heels and toes. It's a classic case of overuse. Here's a simple plan to avoid it:
- Start with 5–10 minutes on soft ground (grass or leaves).
- Increase the time by 2–3 minutes each week.
- Add in a “simulated” session with a light backpack (5 kg) when you reach 20 minutes.
The gradual increase allows the muscles in your feet to adapt without causing blisters or overexertion.
How do I know if my feet are getting too tired?
A clear sign is when you start to feel like you have to “squeeze” your toes to keep your balance. That’s when you should pause, massage the soles of your feet with a foam roller, and possibly do some light toe raises. A quick checklist:
- Swelling or redness in your toes?
- Numbness that doesn't go away after rest?
- Heel pain when you press down on the ground?
If any of these symptoms appear, lower the intensity and give your feet extra recovery – a day without boots is sometimes the best training day.
Is it safe to use barefoot boots on uneven rocks?
Yes, but you have to adjust your stride length. On large, loose rocks, you can “jump” a little to reduce the pressure on your toes. On slippery, packed rocks, it’s better to keep your feet close to the ground and let the sole do the work. An example from a mountain hiker in Åre: he started with short strides on the gravel road, but when he reached a rocky slope, he practiced placing his heel first, which gave him better grip without putting strain on his toes.
By listening to your feet and adjusting your technique, you reduce the risk of sprains and gain more control over each step.
Final tips to avoid common mistakes
Please summarize these three "musts" before you throw yourself into the snow:
- Clean and dry your boots after each session.
- Increase your training volume gradually, and try using a light backpack.
- Choose thin, moisture-wicking socks and listen to your body's signals.
If you follow this checklist, you will quickly notice the difference – stronger feet, drier winter adventures and a feeling that the ground actually becomes your best training partner.
conclusion
So there you have it – we’ve gone from the first step of getting the right size to how to train your feet and avoid common pitfalls. Does it feel a bit like you’ve been given a checklist for both everyday life and winter adventures?
Remember, barefoot boots are more than just a new pair of shoes. They're a way to let your feet regain their natural strength, while keeping you warm without sweating. Once you've found a style that fits you well, make them a part of your routine – start with short walks, gradually increase your pace, and listen to your feet's cues.
Key points to take with you
- Choose the right fit and material for your foot type.
- Clean and dry your boots after each session.
- Train your feet with simple exercises before you go on longer hikes.
- Build up the load step by step and avoid going too far too fast.
Are you ready to let the ground be your best training partner? Try a pair of barefoot boots on your next short walk and feel the difference right away. If you like the results, keep exploring more routes and let each step be a small victory for both your feet and your soul.
frequently asked questions (FAQ)
How often should I clean and dry my barefoot boots?
It's tempting to just shake off the snow and forget about the rest, but a quick dry after each session works wonders. Use a soft cloth for the inside, let the shoes sit on a ventilated shelf for at least an hour before putting them in a shoe rack.
If you are out in damp weather, give them extra airing – half an hour in a dry room is often enough. This way you will avoid odor and keep your feet dry.
Can I wear thick socks in barefoot boots on a winter hike?
Yes, but only if you really need extra warmth. Thin, moisture-wicking merino socks are usually enough, as they allow the foot to breathe and maintain the feel of the ground.
If you choose thicker socks, make sure they don't pinch your toes – a little pressure can quickly turn natural movement into discomfort.
What type of surface is best for starting to train with barefoot boots?
Start on soft grass or a forest path with leaves and dirt. This provides some cushioning but still lets you feel every rock and every trail.
Avoid hard concrete slabs or steep slopes at first – they can stress the new muscles in your foot before they are ready.
How do I know if I have chosen the wrong size?
A simple test: your toes should be one finger's width in front of the sole when you stand upright. If you feel pressure on the edge of your heel or your toes are pinched, the shoes are too small.
If you have a little bit of looseness in the heel cap but still feel a stable feel, you are probably the right size. Feel free to adjust with an elastic shoelace if you are unsure.
Are barefoot boots warm enough for deep snow?
Winter-lined models with sheepskin or Primaloft provide really good insulation without making you sweaty. For really deep, loose snow, you can add an extra layer of thin merino wool socks.
Remember that the heat comes from both the lining and your own blood circulation – move regularly so that the blood keeps your feet warm.
Can I wear barefoot boots on uneven rocks without hurting my feet?
Absolutely, but adjust your stride length. On large, loose rocks, short, controlled strides are often best. On slippery, packed rocks, let the sole do the work – keep your foot close to the ground and press down with your heel first.
If you feel that your toes are getting too much strain, pause and try walking heel first to reduce the pressure.
How long will it take before I feel noticeable improvements in foot strength?
Most people notice a difference after two to three weeks of regular use, provided you gradually increase the load. Do short sessions of 5 to 10 minutes and add two minutes every other week.
If you combine this with simple strength exercises – heel-to-toe walking, toe raises and one-leg balance – you can see improvements after just one week.
additional resources and links
You may have gotten this far and are wondering where to dig deeper. Here are some ideas that feel natural to explore without having to search the first page of Google.
Inspiring blogs and forums
There are several Swedish outdoor communities where people share their barefoot boot experiences. Check out Friluftsbloggen for personal reports about winter hikes in minimalist shoes. You can also join the Barfotaforumet on Reddit – there is always someone there who has tested a new model on an icy mountain peak.
You will often find practical tips that are not in the product descriptions, such as how to layer with thin merino socks or which improvised drying methods work when you are out in the mountains.
Video guides and test reviews
YouTube is full of short videos where Swedish hikers show off their barefoot boots in action. Search for "barefoot boots winter test" and you'll get both step-by-step walkthroughs of how to tackle deep snow and comparisons between different insulation materials.
It's easy to see how the sole behaves on slippery rocks or how the lining breathes when you walk a small trail in the forest. Such visual resources can make the difference between a successful first trip and a boring experience.
Scientific articles and research
If you want a more in-depth understanding of how barefoot shoes affect the biomechanics of the foot, you can search PubMed or Google Scholar for studies on "minimalist footwear" and "cold climate performance." Many universities in Sweden have published articles on how natural foot movement can reduce injury risk in winter environments.
It's also worth reading about how wool and fleece linings regulate temperature without creating sweat, so you can compare the theory with what you actually experience in the field.
Checklist for your own tests
Once you've gathered some inspiration, create your own mini-test. Set up a simple template:
- Terrain (snow, ice, leaves)
- Temperature (–5 °C, 0 °C, +5 °C)
- Sock type (thin merino, thick fleece)
- Experience (warmth, comfort, grip)
Write down what you notice after each session. This way you will have a personal knowledge bank that you can refer to when considering new models.
So, what’s next? Maybe a short video tour of your favorite trail, or a forum post asking a specific question. Whatever you choose, there are plenty of free resources that can help you become even more confident in your barefoot boots.